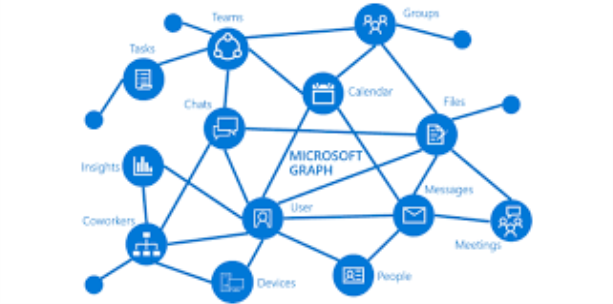
In this blog post, we’re going to explore how to send emails using Microsoft’s Graph API in combination with PowerShell. The Graph API provides a unified programmability model that you can use to take advantage of the tremendous amount of data in Microsoft 365, Azure Active Directory, and other Microsoft services.
Microsoft Graph is a powerful API provided by Microsoft that allows for interaction with various Microsoft services such as Office 365, Azure Active Directory, Intune, and more. With Graph, we can automate tasks that interact with these Microsoft services in a simple and intuitive way.
One such task is sending emails, which we can automate using Graph API and PowerShell. In this guide, we’ll walk you through how to do this, using a provided PowerShell script as our starting point. We’ll also be generalizing all the variables to make the script usable for any case.
The script is divided into three main parts:
- Authentication
- Preparation of the email’s body and headers
- Sending the email
Let’s walk through the script step-by-step.
IMPORTANT: For this script to work correctly, the application in Azure AD that corresponds to your $AppID and $AppSecret needs to have the Mail.Send permission granted under the Microsoft Graph API permissions. Without this, the application won’t have the necessary permissions to send emails on behalf of users.
Note: Make sure to replace all the placeholder variables with your actual values.
# Parameters – replace these with your actual values
Param (
$AppID = “<Application ID>”,
$Tenant = “<Your Tenant ID>”,
$AppSecret = “<Application Secret>”,
$GraphUrl = “https://login.microsoftonline.com/$($Tenant).onmicrosoft.com/oauth2/v2.0/token”
)# Authentication
$Body = @{
client_id = $AppID
client_secret = $AppSecret
scope = $Scope
grant_type = ‘client_credentials’
}
$AuthorizationRequest = Invoke-RestMethod -Uri $GraphUrl -Method “Post” -Body $Body
$Access_token = $AuthorizationRequest.access_token$Header = @{
Authorization = “Bearer ” + $AuthorizationRequest.access_token
}# Connect to Microsoft Graph
Connect-MgGraph -AccessToken $Access_token# Email details
$MsgFrom = “<Sender’s Email>”
$ccRecipient1 = “<CC Recipient 1>”
$ccRecipient2 = “<CC Recipient 2>”
$EmailRecipient = “<Recipient’s Email>”
Write-Host “<Your Error Message>”
$MsgSubject = “<Your Email Subject>”
$htmlHeaderUser = “<h2>Your Email Header</h2>”
$htmlline1 = “<p>First paragraph of your email body</p>”
$htmlline2 = “<p>Second paragraph of your email body</p>”
$htmlBody = $htmlHeaderUser + $htmlline1 + $htmlline2
$htmlMsg = “<html><body>” + $htmlBody + “</body></html>”# Get the user id for the sender
$UserFrom = Get-MgUser -Filter “mail eq ‘$MsgFrom'”
$UserIdFrom = $UserFrom.Id# Create message body and properties and send
$MessageParams = @{
“URI” = “https://graph.microsoft.com/v1.0/users/$UserIdFrom/sendMail”
“Headers” = $Header
“Method” = “POST”
“ContentType” = ‘application/json’
“Body” = (@{
“message” = @{
“subject” = $MsgSubject
“body” = @{
“contentType” = ‘HTML’
“content” = $htmlMsg }
“toRecipients” = @(
@{
“emailAddress” = @{“address” = $EmailRecipient }
} )
“ccRecipients” = @(
@{
“emailAddress” = @{“address” = $ccRecipient1 }
} ,
@{
“emailAddress” = @{“address” = $ccRecipient2 }
} )
}
}) | ConvertTo-JSON -Depth 6
}# Send the message
Invoke-RestMethod @MessageParams
This script first authenticates with the Graph API using the application ID and secret and obtains an access token, which is then used to set up the authorization headers for the Graph API request.
The script then connects to the Graph API and prepares the email’s subject, body, and recipient details. Note that the email body is composed of HTML, allowing for rich text and formatting in the email.
Next, the script retrieves the user id for the sender’s email address and constructs the URI for the sendMail Graph API endpoint. The email’s details are then converted into a JSON structure within MessageParams.
Finally, the script sends the email by making the actual REST API call with the Invoke-RestMethod cmdlet.
This script is a powerful way to automate sending emails from your Microsoft 365 account using PowerShell and the Microsoft Graph API. It’s flexible and can be adapted for various scenarios such as sending error reports, notifications, reminders, and more.
See you in the next post.
Joao Paulo Costa

